When you buy a laptop or PC, you often struggle with the beginning set up. So, if you have really got a laptop or PC, firstly congratulations and secondly, this article is only written for you. So go on reading. We are going to help you through and through to make your first set up of Microsoft in an easy manner. When I first bought my laptop and was going to set up all my details and start it, the whole process was very hectic and confusing. If you are new to this then you can easily follow the things mentioned in this article to make this whole process easy for you. You can now first go to the steps and follow them very easily. If you were searching for what to exactly do with this new laptop that you got, then you are reading the right article. You are going to follow these few steps to make your system accessible.
First Step of Setting Up Your PC or Laptop
So the first step that you are going to do is to follow whatever your screen is pointing at. The first time switching on your laptop and it is always a little bit easier as the screen will point out what to do and what to click. There are some settings which you will be able to set up with the help of the directions given on the screen itself. The first thing now you need to do is click on the power button and switch on the laptop. As soon as you switch it on, you will be directed to some setting which will ask for your language and keyboard preferences. You should select whichever is convenient for you.
Connect to Internet for your Microsoft Account-
As you come to your next step, you have to make sure that your system is connected to the internet. An internet connection should be available around your system. You have to now connect your PC or laptop to the internet. You can click on the internet option available on your taskbar. It is also available in the notification bar, which is available on the taskbar to you fat right. As your internet connection tab pops up, you need to select the network and put the password. This will connect your system with the internet.
Microsoft Account-
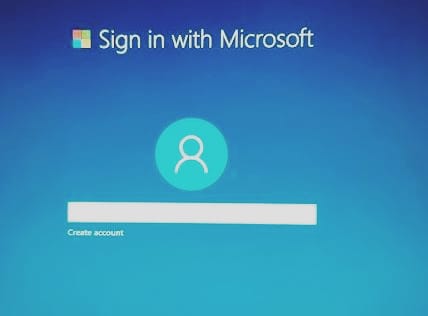
Now you are all set for your next step, which is to create a Microsoft Account. It becomes quite complicated if you go blindly into the process. It is always handy to know something about it beforehand. So, when you click next after you connect the system to the internet, you will get an option to create an account. So now you will be creating an account with Microsoft. So if you already have an account, for example, you used a Microsoft account on your previous laptop or PC. So you can use that Microsoft ID and password to log in. If you don’t have an account then you can login.
Log-in to your Microsoft Account-
To log in, first you have to verify your details. You have to put your email id in which you will receive a verification code. The email should be an active email and you should have access to the email as well. You can put the verification code as you receive it in the specific place. You can create your password as well. After this, you need to put in some more personal and customized details which will differentiate your account from someone’s account. You will now first need a username which will be pooping up while signing into your account. The process will also ask for your mobile number and a recovery email which will be used in case the present email as well doesn’t work.
The last step was to create an account and now you have to log in into the account. After you login, there will be some steps regarding the security of your PC or laptop. You can select your privacy setting according to your preference. If you wish to put lock in your system that can as well get accessed during this process. You can set a six digit PIN to keep your PC or laptop safe from any unwanted gaze.
Security and Update settings-
There is one security setting as well which needs to be activated in order to keep your laptop safe from any types of cyber attack or virus as well. To activate the Microsoft security protector, you have to open your Windows Security. You can access this from the main menu or directly search it in your search box. Do a quick run to make sure everything is fine and also check for any updates. You can along with this check for updates. You can go to your main menu to open the settings or search ‘Settings’ in your search box. After you open the setting you need to find the ‘Updates and Security’ option. In that you will come across Windows Update, where you can check for updates. One important tip is to never leave your updates. Always keep your laptop updates to keep it running smooth.
Some more customization-
After all this setting up of ‘Privacy Settings’ and ‘Security setting’ you can move on to some customization as well. There is a very long list of customizations which you can very easily add. But for now, there are a few things which you can do. First, you can set some colors and themes. There are certain personalizing which you can do. All you need to do is right click on the desktop and when the pop up options come select ‘Personalization’. You can also go and check out some display settings which will give you instant options to change your wallpapers and other settings on display.
Conclusion
These are some of the things and steps which you can follow from the moment you get your new system. It is very important to have some knowledge from the beginning itself so that you unknowingly don’t hurt your PC or laptop’s health. It is important that you also have some important changes done. This article can guide you through the beginning process of setting up your PC or laptop.