
When we all come across the problem of our laptop becoming slow or rather difficult and not smooth then we try our best to do something which will help us. One of the most important steps which you can do is change the RAM, which will instantly boost its overall performance. It helps us to get a better performance and also allows us to do multiple tasks very easily. This article will be discuss how you can change the RAM of your laptop.
Step 1
The first step which everyone should be very observant about is whether your laptop is compatible with the change in the first place. It is seen that many laptops don’t have the option of upgrading the RAM. So you need to check whether it is even possible for an upgrade and, along with that, you should also do a search on what type of RAM upgrade is possible and how much.
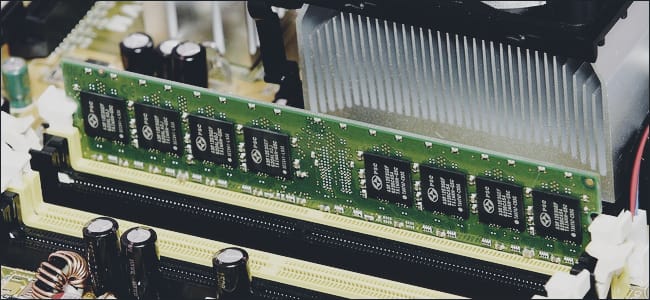
RAM is the Random Access Memory which is present in every laptop and the amount of RAM a laptop can support varies depending on different models. It is basically used to store data temporarily. It is a very unstable which is only used when the computer is in use. It is not the same as any SSDs or drives. The memory only stays when we are using the laptop and the moment we shut the laptop down, RAM loses all its memory. The main role of RAM is to provide space for the memory to work while the laptop is in use and, if it better works the performance is much smoother.
Step 2
If you find that your laptop does support an upgrade in RAM, then the next step is to find out how much your laptop can support. So you can go to the official website of the laptop company and check for it in the model details section. You can also look for the user manual and check it. You can also go through some browsing to get the details. You can also use any customer service to find the information in depth.
Step 3
So if you are planning to do it on your own, you must have some knowledge about your laptop. Laptops often have good access to the internal components through the bottom panel. So you can check through the bottom panel about the current configuration of the RAM. By checking the current configuration of the it will help you understand which you should buy. You should also check the slots used in the laptop. The capacity of each module should be checked along with the slots and, lastly, the maximum the laptop can support. This will help you in selecting the RAM which you will be installing on your laptop.
Step 4
The next step is to actually buy the RAM which is best for your laptop. There are some elements which you should be concentrating on while choosing the RAM, which are capacity, speed and type. There are types of as well, like DDR4 or DDR3 which you need to decide on based on the fact that you got from analyzing its compatibility from the user manual or customer care. You also look for what will be the speed and capacity. The company which you will be buying should have a good reputation as well, so that the product doesn’t come out to be bad which,, actually can harm your laptop. So it is better to keep all these points in mind and then buy it.
Step 5
Now you need to disconnect your laptop and shut it down so that you can start with the upgrading process. You need a few tools as well, like screwdrivers, etc. You need to ensure that the surface you are working on is static-free. If not, it could harm certain electronic parts of the laptop which are very sensitive. You should open the bottom panel with a small Phillips screwdriver. The slots will be very visible once you open the bottom panel. You can also identify the place where you will be installing the new RAM. You can very gently put the notches on the slot and press down a little. You must ensure that the new RAM properly clicks into the slot.
Step 6
If there are multiple slots and you want to do a multiple RAM installation, then you can repeat the last process and get the work done. You can now just close the bottom panel and switch on the laptop. You can check whether the system has acknowledged the RAM or not. You can go to the properties setting in your setting and check it. You can also use the diagnostic tools from the operating system. If it is not recognized then you can do a UEFI or BIOS update. You will be able to get the update from the official website of the laptop’s company.
Conclusion
This is the whole process through which you can easily upgrade the RAM. It is seen that usually in India the cost varies on the capacity of the RAM as well as company. So you can get a 2000 rupees and even a 12000 rupees. You need to buy the one which is the most compatible for your laptop. The company, though, should be good which keeps the idea of harming the laptop away.
You can easily follow the steps mentioned in the article to upgrade your laptop’s RAM. It is really easy to do. However, if you are not confident enough and think that you can’t then you can always get the help of a professional. However, it is better to buy the RAM yourself and take it to a place with whom, you trust your laptop. You should also not trust all the local shops. They can easily open your laptop and replace the original parts with duplicate ones. You should also be aware of the type of RAM you are using. You can actually take help from customer care and ask them about the most compatible quality for your upgrade.